The Tutorials Section
Last updated: December, 6 2002 3:55 PM (CST)


How to Install a Metal Pulse Rifle
Stock on the Tokyo Marui M1A1 Thompson.


Please Note: Many of the following images and instructions were created by
Gary Weaver II. Gary stopped making pulse rifles, and parts over a year ago,
but his suggestions and directions are very useful and sound. I've included
suggestions as well from my own experiences in building AIRSOFT pulse rifles.

These instructions can of course be modified to work with Thompson SMG parts
other than those made by Tokyo Marui, however, this tutorial is aimed
at those who are specifically making a firing airsoft Pulse Rifle.

Although I have used these instructions in making my own props, I accept
NO RESPONSIBILITY and NO LIABILITY if you ruin your own airsoft gun
or other parts using these instructions. They worked for me, they might not
work for you. These instructions are worth exactly what you paid for them.

ALSO NOTE: The locking bolt's are custom machined. I have done a run of them in the past
for my own use and I no longer have any available. If the demand is there I can be
convinced to make more, but the machinist I use charges $40/hr so I need to have
more than one person needing bolts.

Dean O Does periodic runs of movie authentic metal "Hero" barrel vents and
stock sets. They are very nice quality and quite durable. If possible, I highly
suggest buying a set.
To do this modification will require tools. I suggest...

You will also need the following items. (1) Tokyo Marui M1A1 Thompson Airsoft Gun.
You need the M1A1 style, the cheaper, plastic, M1928 versions with the top
mounted charging bolt handle will not work for this mod.

You will need one of the custom locking bolts. You will need a metal stock set. (duh!)

You will need to read the manual that came with your Thompson to figure out
how to disassemble the gun!

I'm going out on a limb and assuming you have some experience working on airsoft
guns, so I won't get into the nuts and bolts of gun disassembly.

Again, I assume no responsibility or liability if you break your gun
attempting to follow this tutorial!


Part 5: The Stock


So, you have your barrel vent installed and NOW you're fired up!
Well, here we go again...

You'll need many of the same tools you used last time, plus a Dremmel style
rotory tool will come in handy.

Remember when you removed the outer barrel from the upper receiver of the Thompson?
Find those parts you removed (the receiver locking button, spring and silver stock nut)
you'll need them to reassemble the gun.

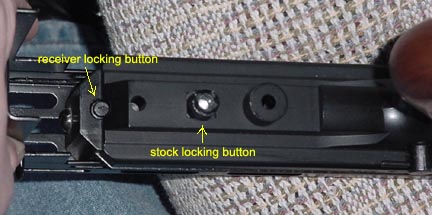
Receiver, locking button and parts that will become the locking stock release button. Image By GWII.

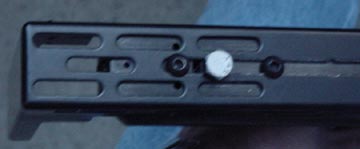
Locking stock bolts, Image By Rook.

For these instructions you'll also need a locking bolt... although you can also
attach a non-moving metal stock to a resin or airsoft Thompson by omitting
a couple steps. These instructions are mainly aimed at those installing
a sliding stock.

And you'll need the upper receiver of the Thompson again.
First, you'll need to mark the locations that you'll need to drill. Since you
removed the rear sights from the Thompson, you already have 2 holes pre-drilled
that you use for the stock guide bolts.

Image By GWII.

Image By GWII.

Image By GWII.

Image By GWII.

You may want to remove this metal area prior to drilling out the locking bolt hole.
To cut this metal out you'll either need a small hacksaw, or an aluminum cutting
bit for a dremmel. You'll need a bit designed for aluminum because the metal will
clog a grinding stone or sanding wheel in short order.

Image By GWII.

Tap the guide bolt screw holes using the size as described in the image above.

Image By GWII.

Now that your holes are all in place, you may need to modify your stock to work
with the locking bolt system. On the top of the stock you'll need to drill 3 holes,
as shown by this image. Click the image to view a full scale printable version.
Image Scanned by USCMC. Thanks Alex!

Make sure that the actual sliding groove that you cut is ONLY as wide as the
guide bolts themselves! If you make the groove any wider the locking stock
will not work! The 3 holes you drilled first are what the locking stock
bolt sits down into.

After Tapping the holes, place your stock on top of the upper receiver and insert
the guide bolts.

Image By GWII.

Image By GWII.

With the stock in place, and the guide bolts as well, insert the locking bolt through
the notch in the top of the stock and the hole in the upper receiver.

Image By GWII.

Drop your spring over the top of the locking bolt and add the lock nut. Leave about
three-quarters of an inch of space between the bottom of the locking bolt and the nut.

Image By GWII.

Remember that silver "T" shaped hat piece that you found back at the beginning of this
project? Well, now's the time to get it out.

Image By GWII.

Image By GWII.

Now you need to drill about halfway down into this piece. The bit size you should use is
11/32 diameter. Use a locking plier to hold onto the piece, as it may grab and spin when
the drill bites into it. And do NOT drill too deeply into this piece! This piece
will function as the release button for the locking bolt. You also need to put a notch
on one side of the "T" ears.

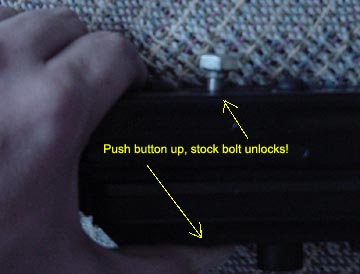
Image By GWII.

Now you need to slightly enlarge the hole in the grip section that originally the
wiring harness for the Thompson came out of. This hole is where the button that
you just finished drilling will come out of.

Now you're almost ready to put it togeather. The next to the last thing
you'll need to do is reposition the wiring for the battery. Since you can't run the
wiring out the back of the gun into a solid stock any longer, you'll need to put it
in a location where it won't be seen, nor will interfere with the operation of the gun
when the shroud is in place.
What I did was run the wires around the front of the mechbox,
under the air nozzle, and out the side of the gun. This is tricky because there's not
a lot of space inside the lower grip that's not being used. Again, what I did was
carefully cut a channel with my rotory tool, around the inside edge on the left
side (Opposite from where the pulse rifle shot counter will sit).
This is where most of the custom work and custom fitting is needed.
You'll also need to cut a small amount off the metal guide
rail on the upper part of the receiver. This small notch is where the wiring will rest.
I also cut a small notch in the lower receiver as well. After all your space adjustments
have been made you may want to shrinkwrap or electrical tape the wiring where it
comes out of the gun to avoid breakage.

Image By Rook.

So now you have your wiring harness in place. You have your barrel assembly installed.
You have your stock and locking bolt in place. Now you need to assemble the rest!
The spring loaded locking bolt will need to rest in the recessed portion that you
drilled into the silver "T" shaped button. You'll need to pull the locking bolt up
as far as it will go and put both halves of the receiver togeather, again, making sure
the locking bolt ends up sitting in the silver push button. Also, don't forget to
put the receiver locking button and spring in the upper receiver before you
put it all back togeather again!


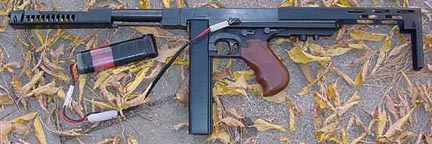
And if it's done correctly, what you end up with is something that looks like this...

Image By Rook.

Image By Rook.

Image By Rook.

Image By Rook.

Image By Rook.

I hope this helped you and answered most of the questions concerning this modification.
You could feasibly also do this mod to a non-firing Thompson made out of deactivated
gun parts, but you would need to move the locking bolt off to the side by 1/4 inch,
or add 2 sets of grooves on the left and right sides to mount your guide bolts to.
All it would take is some pre-planning and some creativity.

Good luck with your projects!

Rook


Back to the Tutorials Main Page.
Tutorial: How to install disassemble your M1A1 Thompson Airsoft Gun. Tutorial: How to rewire or modify the wiring on  your M1A1 Thompson Airsoft Gun.
Tutorial: How to install a metal barrel on your M41 Pulse Rifle. Tutorial: How to install a metal stock on your M41 Pulse Rifle.
Tutorial: How to build an M41 Pulse Rifle. COMING SOON!!
All images, unless specified, are Copyright 2002-2006 Rookscastle.com.